Since the DIY Christmas Ornaments have been so popular, I decided to feature another fun DIY that can be used for gifts this holiday season: DIY Dream Catchers courtesy of the creative minds from Free People’s blog BLDG 25. These dream catchers can be made from found and recycled materials.
Creating dream catchers varies depending on your artistic vision; however, Free People’s guest blogger Rachel Rice has shared a creative way to create “feather” tassels for your dream catcher using recycled plastic bottles. Here are the step-by-step directions courtesy of Free People:
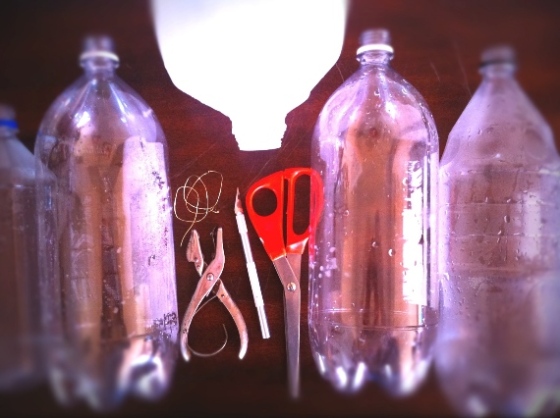
What you’ll need:
-
Clean and empty plastic bottles (clear or colored)
-
Sharp scissors or an X-acto knife
-
Hole punch
-
Wire or Ribbon
-
Vintage trims, fabrics, or lace – your choice!
-
Jump holes (optional)
What to do:

Step 1: Cut the ends off of the plastic bottle using an X-acto knife or sharp scissors.

Step 2: Cut the body of the plastic bottle into segments.

Step 3: Cut out a few feather shapes from the plastic segments.

Step 4: Using a hole punch, make a hole in one end of each “feather”. Make diagonal cuts into the sides of each “feather” using scissors. Optional: jump rings may be added to the feathers at this point if desired.

Step 5: String the feathers together using ribbon or wire, and then connect the tassels to the rest of your dream catcher however you’d like!
All photos courtesy of Free People Blog.


This is a really cool idea. I’m going to make one of these while I’m on winter break at Christmas. Cheers!